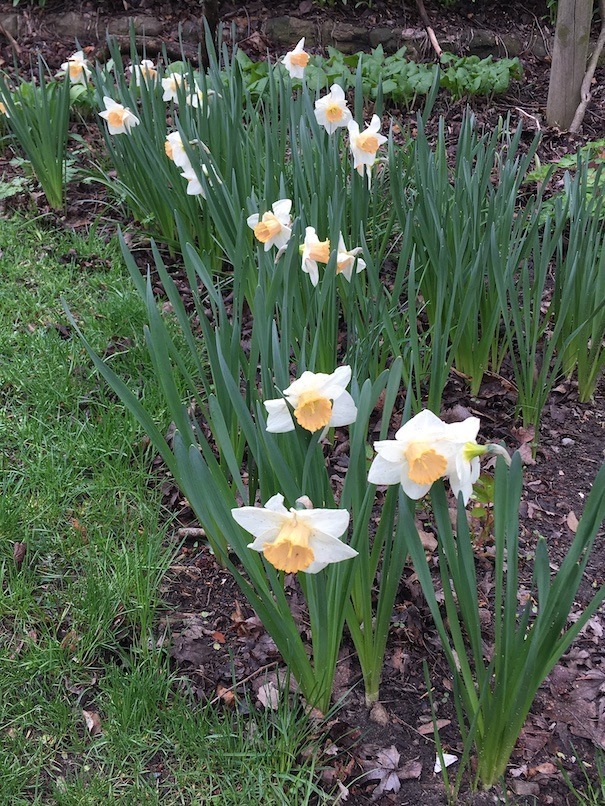
Daffodils are forgiving of many things, but too much shade is not one of them. Last year, I realized that the bed of daffodils that were under the witch hazel were getting shaded out. They were lanky and few bloomed, so I needed a plan.
So what was the plan? Briefly:
- Find a likely new spot for them.
- Wait until the foliage flopped over, but not so long that it completely dries out.
- Dig and sort the bulbs.
- Move them to their new spot.
- Clean up.
The same general process would apply to any bulb, although daffodils are forgiving about how deeply you plant them, so they are good for early attempts. This is a good time to think about whether you want to move any bulbs—as the weather dries out and your bulbs enter dormancy, you will be able to move some, or divide clumps to multiply plants.
Finding a New Spot
Daffodils do fine in full sun, but they don’t mind a couple of hours a day in the shade. Bear in mind that they only need sun while they are actively growing, so a tree that is late in leafing out would be okay as long as sun gets under it—so not under the north side of a tree. Most of my daffodils are on the east side of a serviceberry, but some are between the silver maple and the serviceberry; they get shade from mid-afternoon on.
They need good drainage. Do not put them where there is any ponding after a heavy rain.
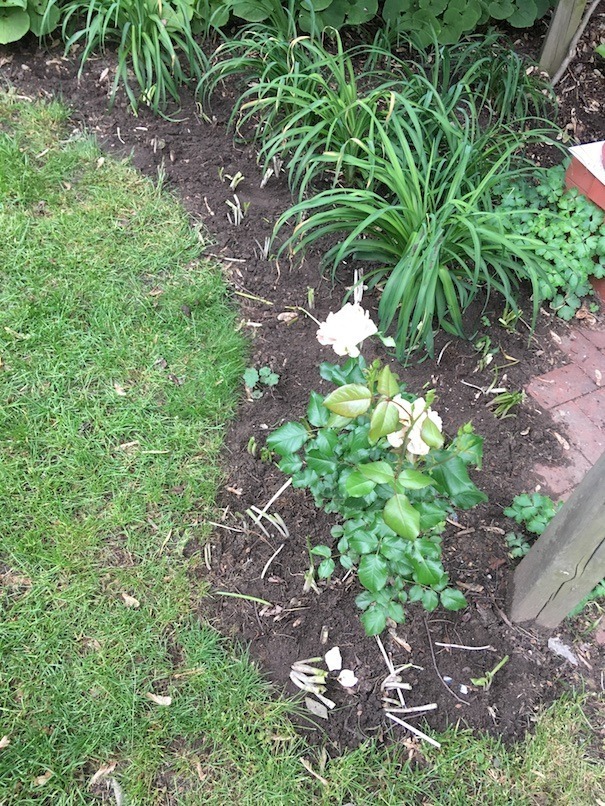
The daffodils I am talking about in this post are now on the south side of my arbor, which is under the southern edge of a huge silver maple. They are bounded east and west by the shadows of houses, and get sun from 8 a.m. to about 4 p.m. Not a full day, but enough to keep a small rose happy, so they should be okay. I moved them out from under the witch hazel; originally, they were south of it, but the witch hazel has thoroughly overshadowed them. This is the same bed that had the Scilla bifolia, but now contains small hostas, Diamond Tiara, instead.
Waiting
This is the hardest part. Wait until the foliage flops over and starts to yellow. At that point, they are no longer producing and storing food; they are shutting down for the summer. It is much easier to dig them when you can still find them, and you are far less likely to split, nick, or miss bulbs.
I have tried waiting until the foliage is shriveling, but you lose two major advantages:
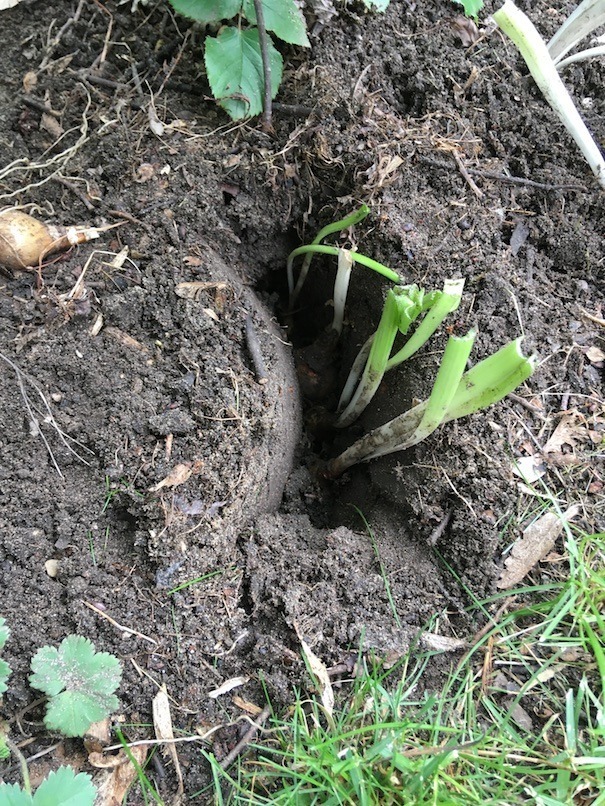
- Pulling gently on the foliage while digging helps you to know when you’ve gone far enough—they will start to loosen.
- The pale subterranean portion of the leaves serves as a handy depth gauge for replanting.
These bulbs were dug in mid-June last year. This year has been chilly and wet, and here it is, mid-June, and they are looking robustly green. You will have to balance impending dormancy and impending weather—if your soil is hard to dig when it’s dry, you will not want to wait quite that long.
Digging
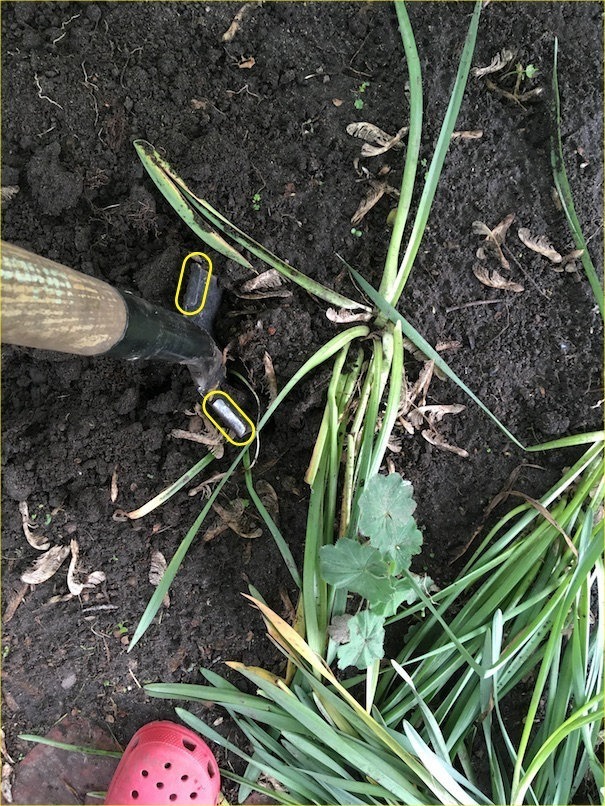
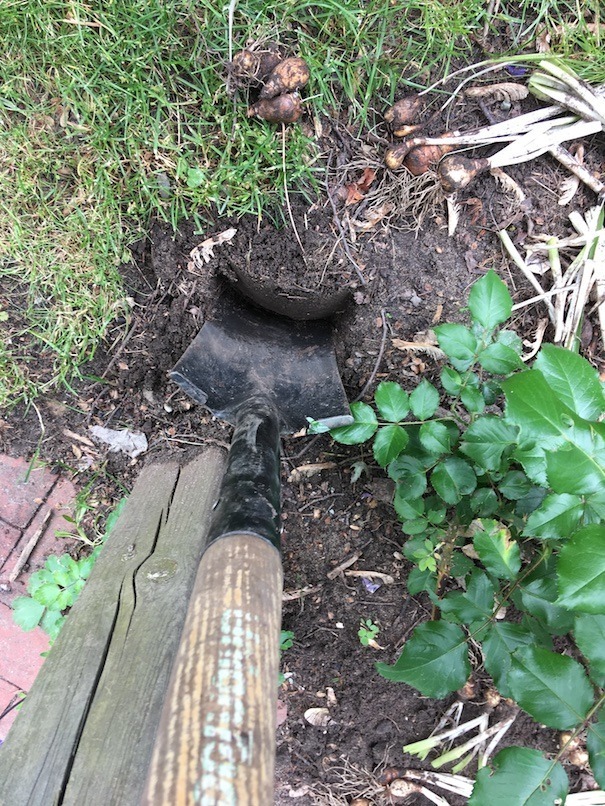
Use a spade, not a shovel, because spade blades are designed to go straight down into the soil—a shovel goes in at an angle and is far more likely to split bulbs. I recommend a poaching spade—they are roughly the width of a clump of daffodils that needs dividing. The spade blade has steps, circled below in yellow, so that you can step to cut into the soil without hurting your foot. The bulbs will be hiding two or three bulb-heights down, nearly the length of the spade’s blade.
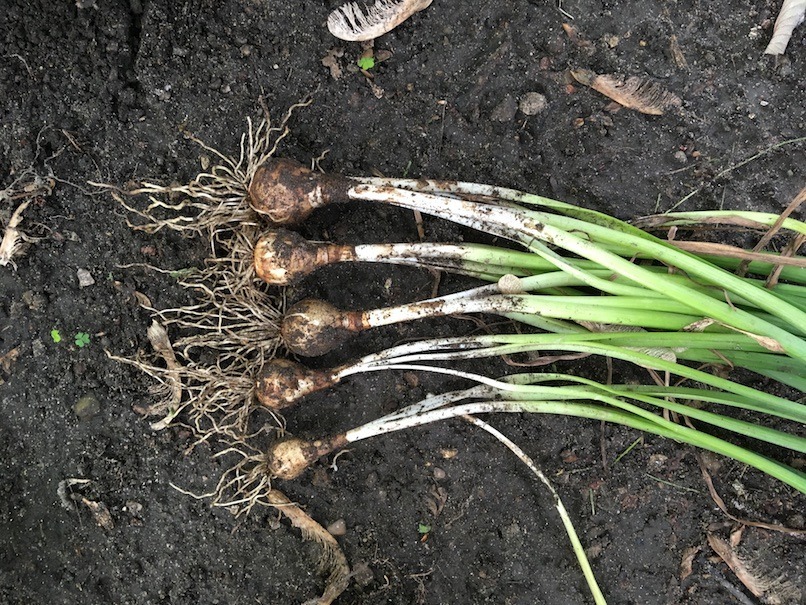
You will be able to separate the bulbs easily. They should be in pretty good shape. Deer don’t like daffodils, and neither do mice or rabbits.
The good bulbs will be nice and plump, of varying sizes. I leave the small ones in the same clumps with their parent bulbs. Occasionally, you may find two that are unwilling to separate—those are referred to as double-nose bulbs. Smile. They are likely to produce two or more flowers in the spring.
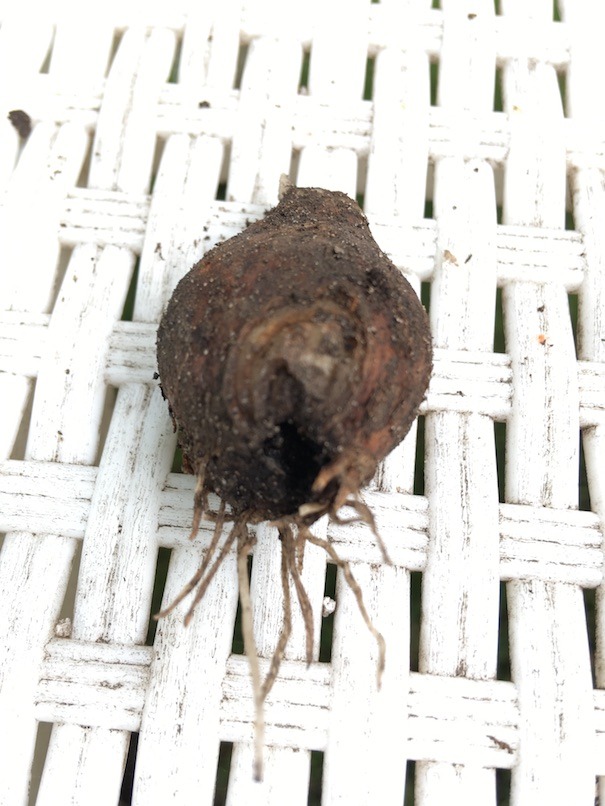
However, you may find a bulb got cut or has a bad spot. Throw those out—or into a hot compost pile—I put the few bad ones I had in the bin for the city’s compost program. It’s hot enough to pasteurize the compost, so there’s no concern about spreading disease.
Once you have all the good bulbs together, trim the foliage so that the white section and an inch or two of the green show.
Moving the Bulbs
It’s OK to let them rest a few days after digging, but spread them out in a dry, shady spot where they won’t get rained on.
Auditioning
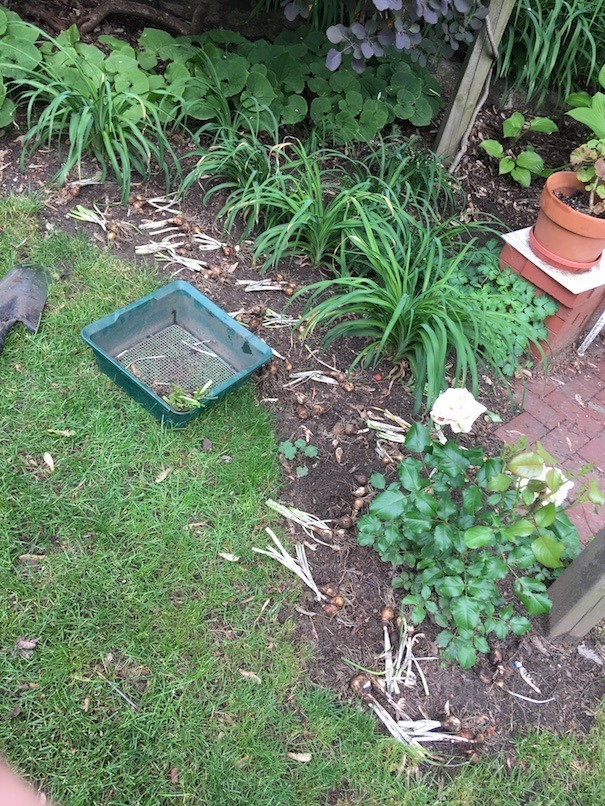
Before you start digging holes, lay them out in clusters. I usually put at least two or three in the same hole. Will they fill the area you have in mind nicely? Will they make a nice progression with their neighbors when they are at full height? What will the bed look like when the foliage goes dormant?
Planting
The method that follows will work in areas with established soil; if you’ve got earthworms, you will probably be OK.
If you are working with a newly created yard, in a new subdivision for example, you may have only builder’s backfill, which is largely sterile and lacking in organic matter. In that event, you will need to prepare the soil.
You will notice that I do not amend the soil. If plants are growing well without amendments, don’t amend.
Sink the blade into the ground more or less up to the step, and rock it gently back and forth (towards you and away from you) to create a slot in the soil. It will take a couple of more slices to get down to the full blade length.
I slide the bulbs down the blade, and then take the spade out of the slot. It can be a tight fit, so I try not to bruise the bulbs. You’ll be able to nestle them down a bit more then. The depth does not have to be perfect, but you want the dirt over the top of the bulbs roughly three times the height of the bulbs. The green tops will poke out, but will not get in the way of your digging.
Be careful when covering the bulbs. They need to be firmly covered, with no big air gaps. I tend to use my feet to shove the soil into place, and then tamp it down with my hands. I have tried doing this with the spade, but sliced more than one bulb that way. Feet and hands seem safer.
Plant the rest of the clumps. The little tufts of foliage will fade quickly, but you will see the daffodils next spring.
The Following Year
Since they have had only about nine months underground, some of which were in winter, it is safer to assume they are not quite fully recovered from their move.
They may bloom, but if you don’t cut the flowers for a nice bouquet when they are first opening, deadhead the plants as soon as the flowers start to fade instead, so the plants do not put any energy into setting seed.
Deadheading
Deadheading is generally a good idea after any plant blooms, but it’s important to do the first year a plant is in the ground so that all the plant’s energy goes into the rest of the plant itself, and not seeds. Use either scissors or a very sharp knife. Cut the flower stalk as far down as you can, at an angle, without damaging the leaves.
Dormancy
The only other possible maintenance is cleaning up the dead foliage in July. If you have something else in the flower bed that will cover the spent foliage, it is usually OK to leave it. If you’ve seen anything that looks like bugs or a disease, remove the foliage and put it in the trash or city compost.
Tool Maintenance
I use a handful of leaves to scrub dirt off the spade’s blade before doing anything further.
Sterilize the spade and scissors blades before you put them away. I wipe them down thoroughly with hand sanitizer and leave them to air dry.
Store all tools out of the weather.